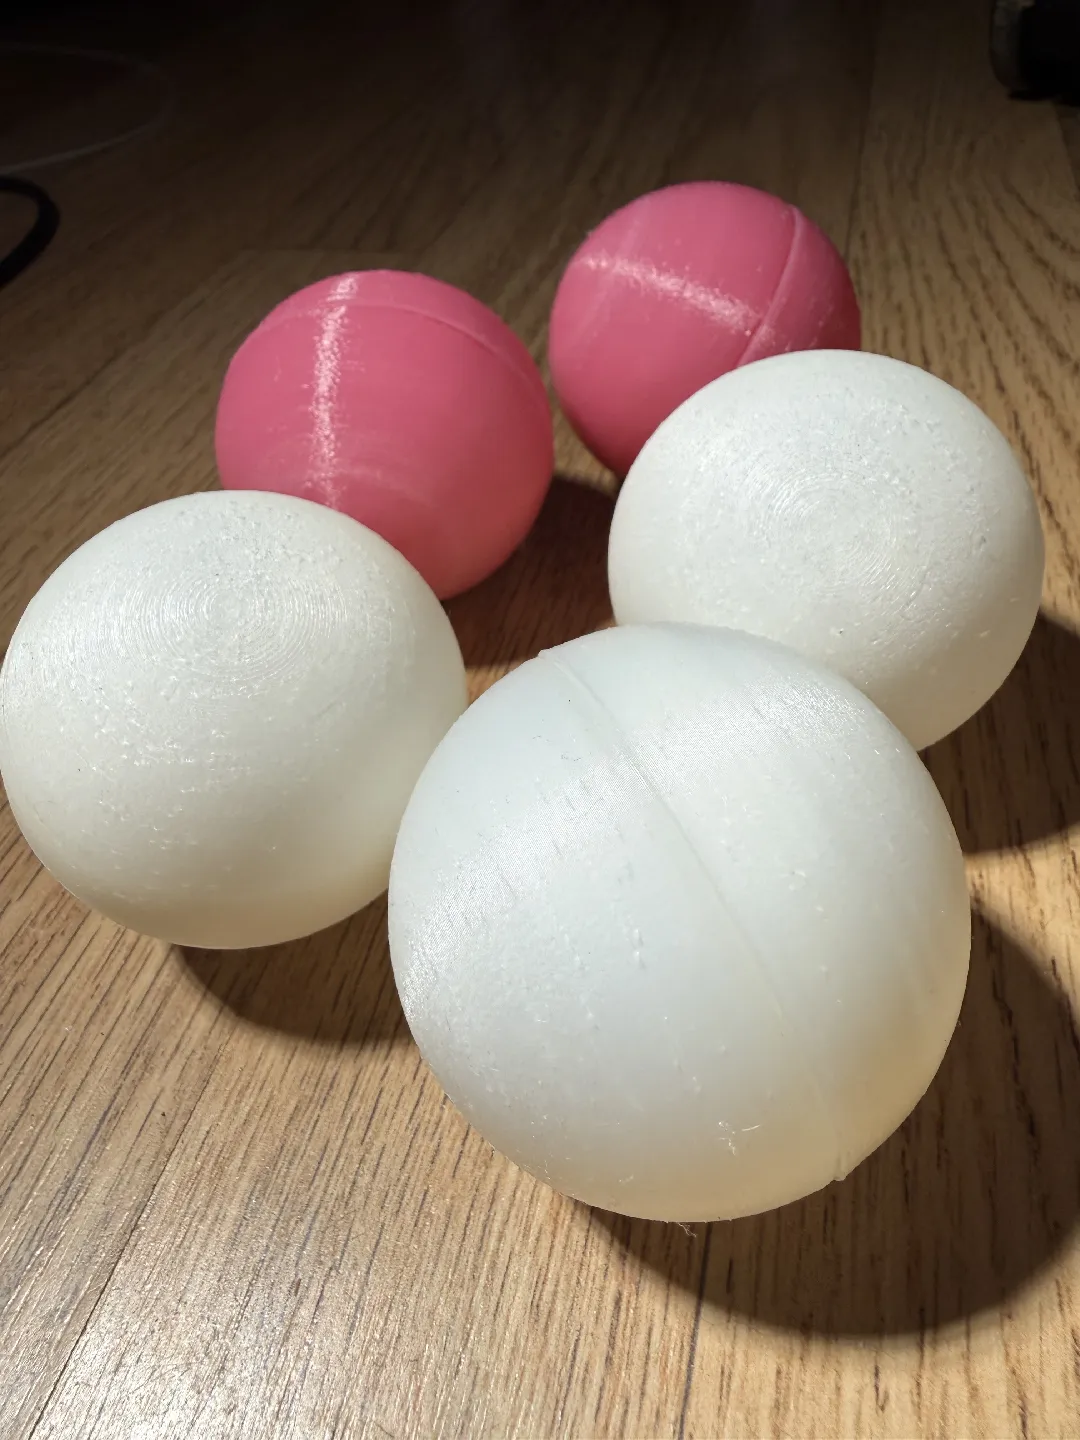
A 3D-printing project. I wanted juggling balls with a proper dead, beanbag feel — so I designed and printed a hollow, two-piece ball in a flexible material that screws together, gets filled with sand, and is glued shut. Here's how it came together.
What's a Russian juggling ball?
A "Russian style" juggling ball is a hollow, semi-rigid shell only partially filled — traditionally about a third full — with fine sand or salt. The loose fill settles at the bottom of the ball, which does two lovely things: it kills spin in the air, and it makes catches completely dead. No bounce, no roll-out of the hand. The style traces back to jugglers repurposing hollow Soviet-era plastic toy balls: drill a small hole, funnel in the filler, then plug the hole — usually with a dab of hot glue, a melted patch of plastic, or a press-fit plug.
My version keeps the physics but redesigns the construction: instead of drilling and plugging a found object, the ball is printed as two halves that thread together, so you fill it wide open and seal it once, permanently.
The design
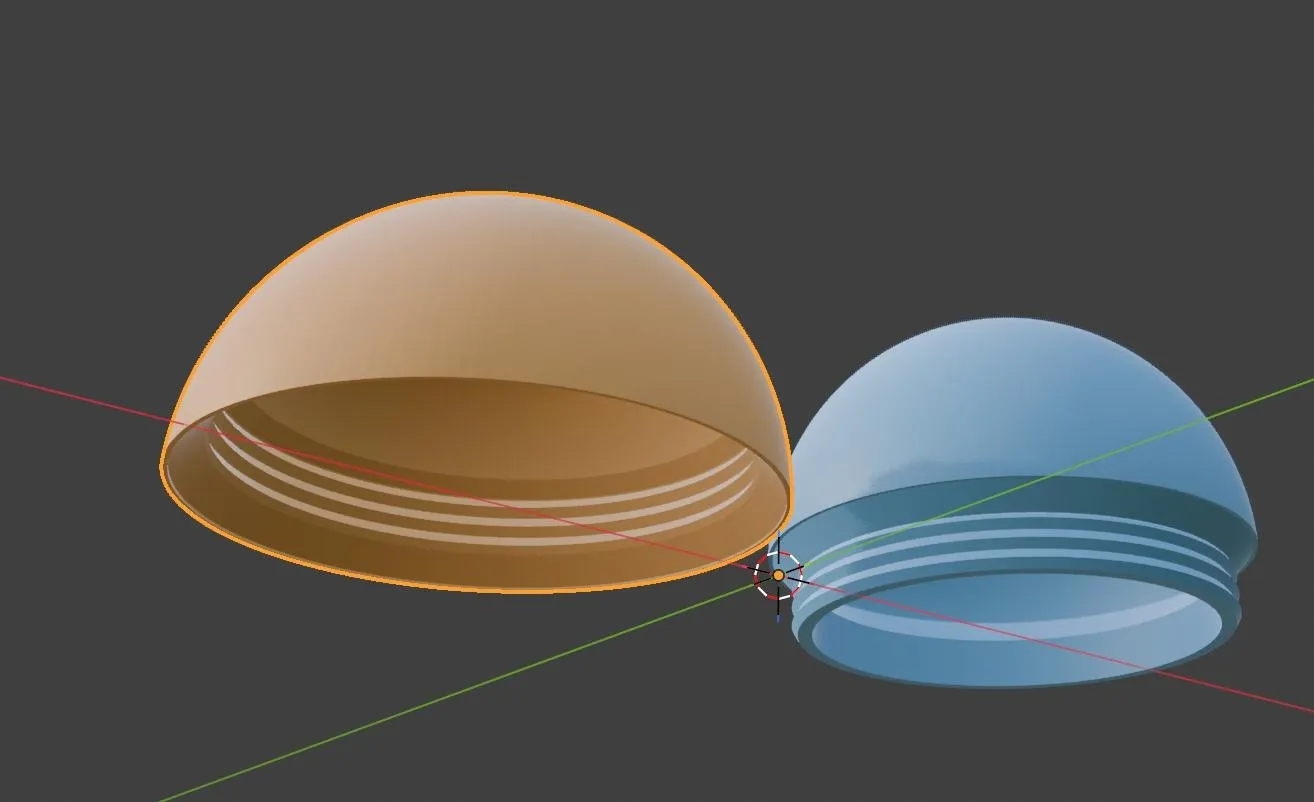
The ball is a sphere split at the equator. All the fastening geometry lives inside: one half has a recessed threaded neck that disappears into a matching threaded bore in the other, so the assembled exterior is a perfect smooth sphere with nothing but a hairline seam.
The threads aren't structural — glue does that. They're just for alignment: a few turns of coarse, forgiving thread pull the halves together squarely, while nested cones self-center the joint as you tighten.
Who knew a sphere could be so hard to print?
You'd think a primitive shape like a sphere would be trivial. It isn't — and TPU makes it worse in two specific ways.
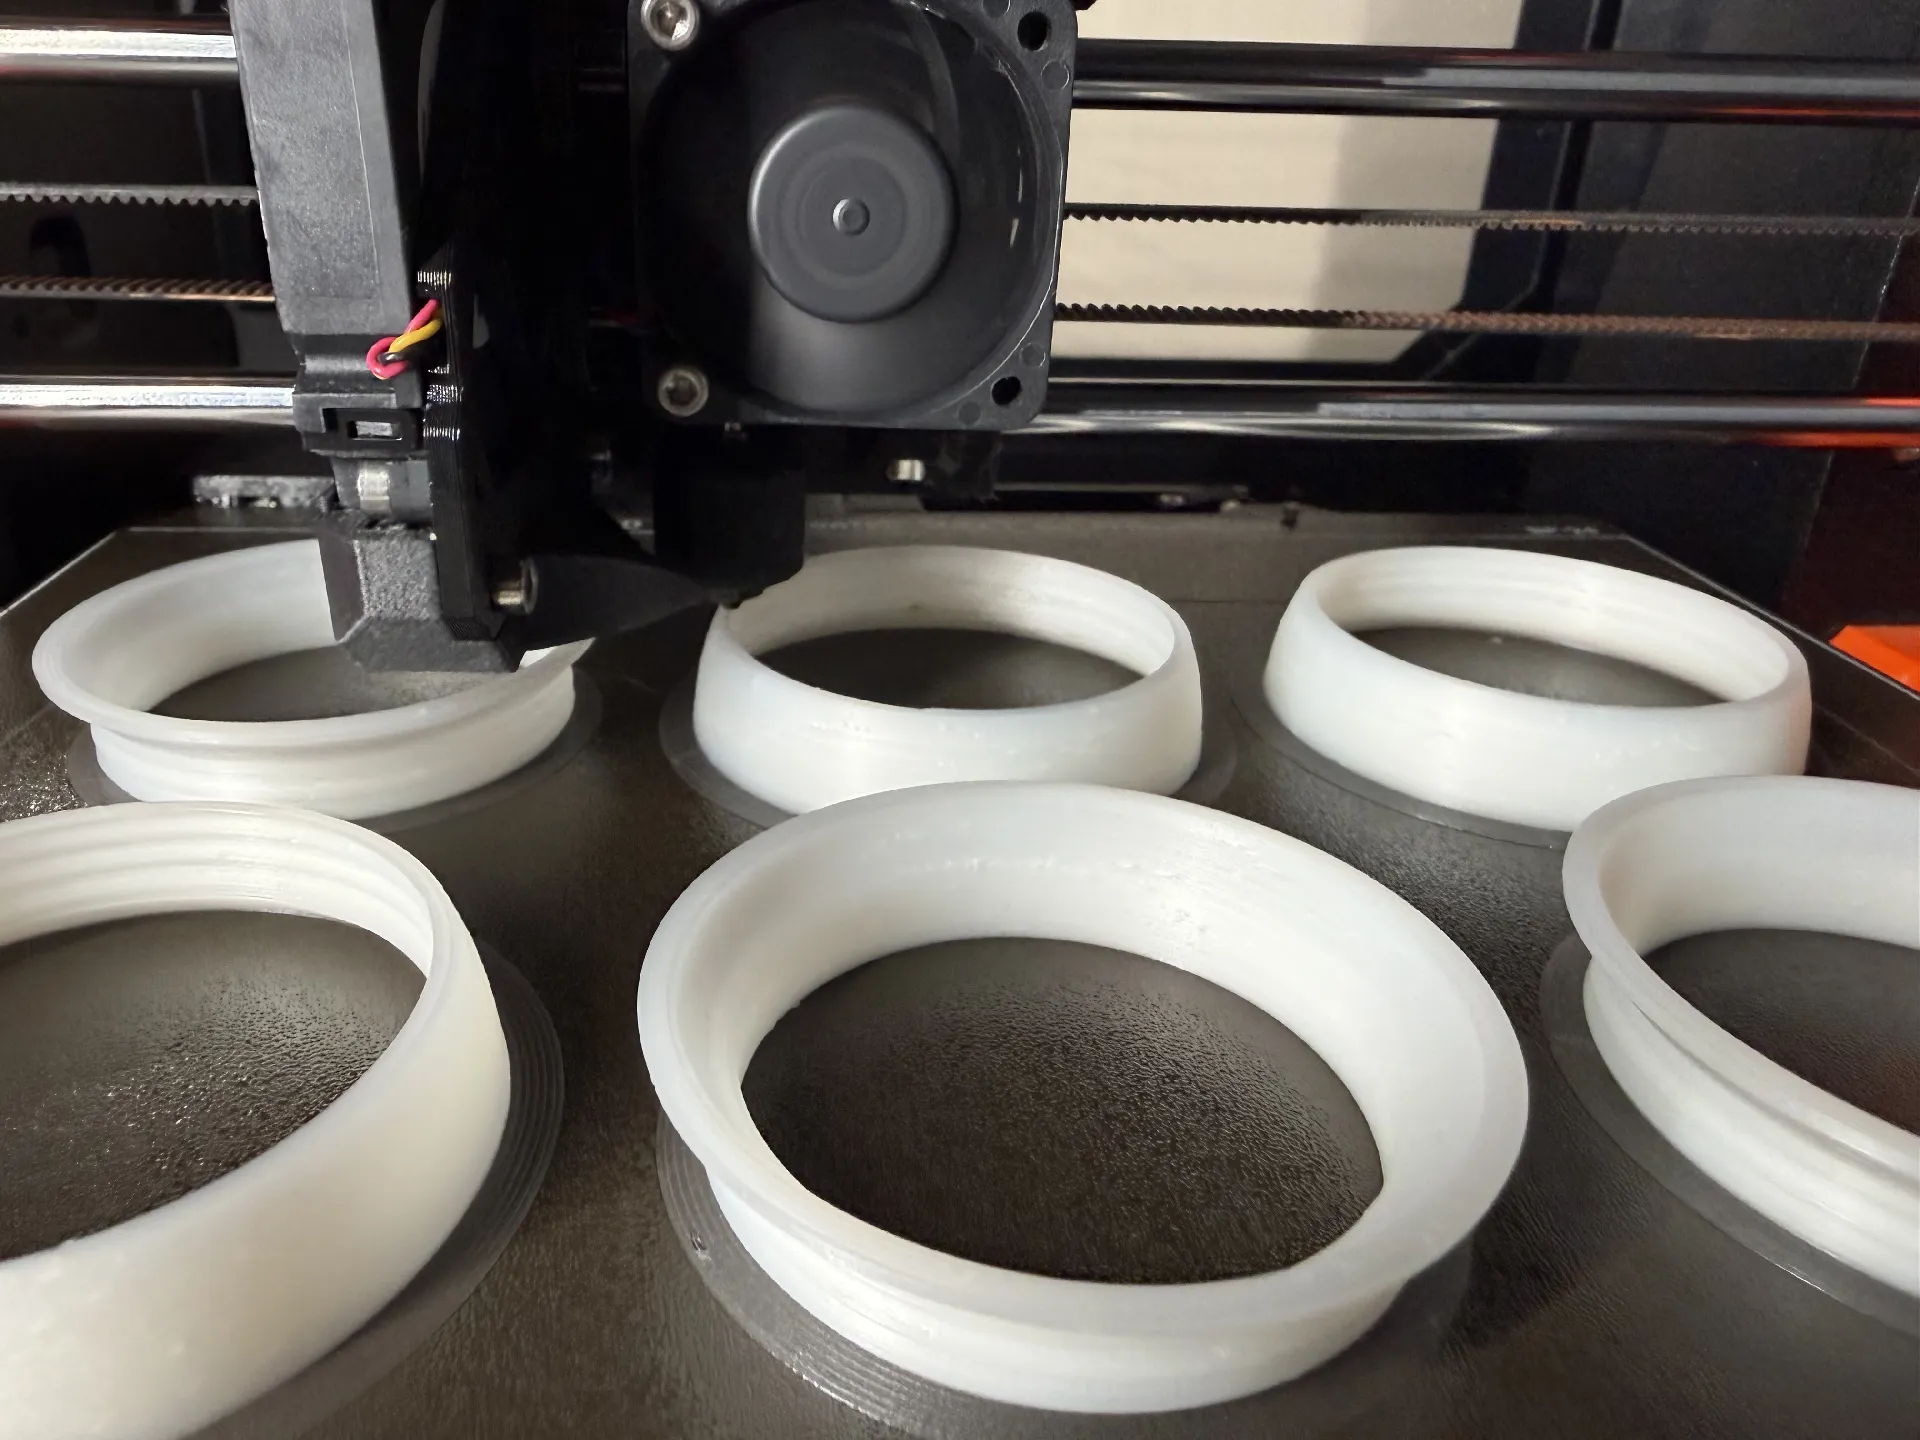
First, TPU bonds to itself ferociously. That's wonderful for layer strength and terrible for supports: the support structures fuse to the part and simply won't tear away cleanly, so the usual answer of "just add supports" is off the table. The design had to print support-free.
Second, TPU barely bridges. A rigid filament will span a small gap and stiffen as it cools mid-air; floppy TPU just droops. And a hollow sphere is essentially made of the two things TPU hates: overhangs everywhere, and a crown that has to close over open air.
So the geometry had to do the work instead. The shoulder where the threaded neck steps out to the full sphere — normally a flat ring hanging in mid-air — became a self-supporting 45° cone. And the dome wall quietly thickens toward the pole, so the crown closes as a band of side-by-side lines bracing each other rather than a single wobbly wall drooping into the void. Both halves print open-side-down, flat on the bed, with zero supports and nothing left to tear off.
Filament experiments
I printed sets in both a budget TPU (Elegoo) and an industrial-grade BASF TPU to compare hardness and print behaviour. The single biggest quality lever turned out to be speed: slowing right down to 25mm/s gave ultra-clean results — crisp threads, a beautifully closed crown — on both materials. The hardness difference comes through in the hand: softer shells squish more into the palm on the catch, firmer ones feel closer to a classic Russian ball shell.
The fiddly bits: weighing and gluing
For a matched set you want the balls within a gram of each other, and that's harder than it sounds. Ironically, the ball sitting perfectly still isn't the issue — the sand fill makes sure of that. The problem is that a sphere contacts the scale at one tiny point, concentrating the entire weight there, and my scales simply couldn't handle that kind of point loading while delivering the sub-gram accuracy a matched set needs. A small ring or cup on the scale (tared out) to spread the contact makes it workable.
For sealing, I used shoe glue. It's designed to bond flexible rubbery materials — exactly what standard epoxies fail at with TPU — and it stays elastic after curing, so the joint flexes with the shell instead of cracking away from it.
What didn't work — and what came next
The original plan was to embed small LED lights for glow juggling. And they nearly worked: in flight they were fine, and even the landings were okay. It was the throw that let them down — the release felt clunky, with the rigid little mass shifting against the sand just as the ball leaves your hand. In juggling the throw is everything, so I dropped the idea.
That dead end pointed somewhere better, though: printed poi. Because poi swing on a tether rather than being thrown and caught, the dynamics are completely different — the shape matters aerodynamically rather than in the palm, and getting the weight right is far easier since you're not fighting a shifting fill for a specific hand-feel. That's the current project, and it deserves a post of its own.
The result
Four balls printed, all four worked out. Fill the open half with sand, run shoe glue around the threads and rim, screw it shut. The whole design is parametric, so scaling is easy — I've since generated a 60mm version, keeping the wall and thread dimensions at their proven sizes rather than naively shrinking everything.